Blog design and digital scrapbooking elements created by Adori Graphics »

Tuesday, November 02, 2010

***Blog Candy***

Hi everyone!!  Hope you are having a fabulous week thus far.  I was checking in on the Cricut Circle MB and doing some blog hopping and came across Enfys' post regarding blog candy she is giving away.  You definitely need to stop by her blog, Going Buggy, and check it out.  Enfys is super talented and makes absolutely beautiful cards...check them out and leave her some love.  While you are visiting her blog, be sure to check out her fabulous blog candy - the entire set of Promarkers from LetraSet (valued at $330).

You'll definitely want to check out her blog each day for the next couple weeks - she'll be posting videos covering different topics pertaining to Promarkers.

Good Luck everyone! Have a great day.....


Friday, October 29, 2010

Robotz Birthday Card

One of my nephews, Nate, turned 11 at the beginning of October.  I can't believe how quickly he and his brother, Cam (9), are growing up - it seems like just yesterday they were itty bitty.  They are my brother-in-laws sons and since the day I met those 'little' boys in 2001, they have been my 'babies' and have held a very special place in my heart.  Luckily for me, although they've gotten older and bigger, they still love to get hugs and kisses from Aunt Jessica -- although I'm sure that'll change once they hit the teenage phase. :-)

You may remember that I made a Robotz birthday card during the MPS National Scrapbook Day challenge (you can see it here) - that card was for Cam's birthday.  Since he loved his card so much (at my MILs birthday dinner, when she was showing the card I made her, he yelled out that I had made him a Robot card for his birthday), I decided to make Nate a card using the Robotz cartridge also.

I think I cut the Robot at around 3" (don't recall for sure, sorry) and I used the font from the same cartridge to cut the "Happy Birthday" sentiment (at 3/4", I think?).  I tried to keep the colors bright and cheery and I love how it turned out.  I used the Spots and Dots Cuttlebug folder to add some texture to the background.  The confetti ribbon and balloon are some buttons I had in my collection.

Nate was so excited when he opened his card - it made my day that he enjoyed it so much.  Thanks for stopping in and taking a peek....have a great day.....

Thursday, October 28, 2010

Birthday Card using Birthday Bash

My darling hubby's birthday is today.  The last week of October is a busy birthday week in our family as my birthday, hubby's birthday, and his youngest brother's birthday are all within the same week.  Generally, we do a combined birthday dinner/get together for the family since all of our birthdays are so close; however, this year, my BIL won't be home for his birthday as he has joined the Navy and left for boot camp on Monday.  But I digress.....

This is the card I made for my hubby's birthday using the new Birthday Bash cartridge.  Although he'll be 33, he's like a big kid at times, so I thought I'd make him a cutsie card. :-)  The elephant is cut at 3 1/2".  I used the Swiss Dots embossing folder to add some texture to his blanket.  I used my white gel pen to add some doodling around the border of the card and the Happy Birthday sentiment are 2 buttons from my stash.  I left it somewhat simple as I didn't get home from work until late this evening and needed to get it made before hubby got home from his clinicals.  Luckily I got it done just in time to hide it away before he got home.

I hope you have a fabulous day...it's almost Friday....

Wednesday, October 27, 2010

Birthday Card

My Brother-in-Law's birthday was Sept 11.  This is the card I made for him.  The present was a leftover cut I had left over from a prior project - it's from the Celebrations cartridge.  I also used the Martha Stewart Ribbon Loop border punch and some balloon buttons from my stash.  The background is embossed with the Happy Birthday Cuttlebug folder and the sentiment was stamped using My Pink Stamper's Simply Sweet Occasions stamp set.

Sorry I'm short on details...unfortunately since I made this card a while ago, I don't remember all the specifics. 

Have a great day.....

Sunday, October 17, 2010

Gypsy Promotion......

Hi there,

Not sure if you've heard the news yet or not.......I came across this info on the Cricut - The Official Page FB page.

Buy and register a Gypsy by Cricut by October 31 and receive 6 free cartridges downloaded to your Gypsy – including the exclusive, all-new “Smiley Cards” cartridge (and don’t forget about Gypsy Wanderings and Gypsy font cartridges that come pre-loaded on the machine). It’s a $419 value!

Free cartridges include:
- Smiley... Cards (new and exclusive to this promotion)
- Tags, Bags, Boxes and More (not available in retail)
- Christmas (not available in retail)
- Blackletter (not available in retail)
- Printing Press (not available in retail)
- Indie Art (not available in retail)

All current Gypsy owners included! Simply register your Gypsy by October 31, 2010 and get access to all downloads. Register at www.cricut.com/gypsy.

Downloads will be available through a special update to your Gypsy starting November 1st.
New Gypsy cartridge downloads are easy! Just connect your Gypsy to your computer and you’ll automatically be prompted how to start. In just a few steps, you’ll be able to download all six cartridges containing thousands of images! And with Gypsy, you’ll have all the cartridge artwork and keypad overlays on your Gypsy screen, so there’s no actual cartridge, handbook, or packaging.

So, if you've been contemplating getting a Gypsy, now is definitely the time so that you can get in on this special promotion.  I'm so excited that current Gypsy owners are included in the promotion....since my G is already registered, I cannot wait to download these cartridges onto my Gypsy on Nov 1.  I already have Indie Art; however, the remaining 5 cartridges will be new to me.

On a side note, I've been really busy with work and some other things lately, so I haven't had much scrappy stuff to post.  However, I have made a few cards in the last couple weeks and hope to be able to get those pictures downloaded and posted soon.

Have a great day.....

Wednesday, September 08, 2010

Sympathy Card

A very dear friend lost her mom last Wednesday.  I wanted to send her a card to let her know our thoughts are with her, so I made this simple card.

The bird is cut at just over 1 3/4" from the Indie Art cartridge.  I used the shadow layer to reinforce the bird a bit since the main image is so delicate.  The pink and turquoise cardstock used for the bird is from Core'dinations....and so is the pink mat that is embossed. 

For the pink mat, I used the Cuttlebug Floral Fantasy embossing folder and then used a file to sand/distress the image a bit and let the white core show through.

I used a 1 1/2" oval punch for the label on which I stamped the sentiment.  The sentiment is from the PaperTrey Ink Mixed Messages stamp set.  Love this stamp set!  I added some ribbon to finish it off. 

The sentiment on the inside of the card is one I found on the web.  I printed it from my PC and then trimmed the paper down to fit on the inside.  I ran the trimmed piece of paper through my Xyron and then adhered the full sheet to the inside.

Thanks for stopping by.....

Tuesday, September 07, 2010

Happy 40th

Tomorrow is a dear friends 40th Birthday....so I made the following card to celebrate.  She loves Starbucks....so my plan is to go and put a gift card in there also.

I used my scrap papers I had for everything except the card base.  I love how it turned out.  Have you noticed I'm on a 'pink' kick lately?  :)

I used the Forever Young cartridge for this card....sorry, I don't remember which art I used for the banner.  I don't remember what size's the cuts were at since I worked on this a couple weeks ago...but I think she was cut at around 4".  I used a Martha Stewart border punch for the pink border.  The letters for "Happy" and the bling ("40") are from letter sets that I bought at Michael's.

And.....thanks to Okie's (check out her blog here) inspiration, I gave sewing a try.  I love, love, love, the extra something the sewing adds.  I will definitely be doing more sewing on my cards in the future.  Thanks Okie!!  Here is a close-up picture of the border I sewed.

Hope you like it.  Thanks for stopping by.  Hope you have a great day.....

Sunday, August 29, 2010

Wish List

I've decided to start working on some projects on my "To Do" list.  I'm hoping to build up a stash of little gifts so I can give them out at Christmas....or for special occasions as they come up. 

I found the tutorial for these Junior Legal Pad Wish Lists over at Splitcoaststampers (tutorial found here) and thought these would be a super cute little gift to give.  They are super quick and easy to make also.  I'm sure you'll be seeing me make some more of these in the future.

The "Think Pink" sentiment is from one of the My Pink Stamper stamp sets.  The paper are some random scraps that I had left over from other projects.

Have a great day.....

My Pink Stamper Challenge - Winter

Robyn over at My Pink Stamper issued a challenge to make a winter themed project.  I've been wanting to play with my new Winter Frolic cartridge and this was the perfect opportunity.  This is standard A2 size card.

The little girl and all layers are cut at 4".  I used a Peachy Keen stamp for the face.  I used some Martha Stewart punches for the borders.  I also added some Diamond stickles to the bottom border to give it a glistening 'ice' effect as well as some silver stickles to the blades of her ice skates.

This will be one of my Christmas cards that I mail out this year.  My goal this year is to make and send out my cards.  Last year I waited til the last minute and so I didn't end up sending out any....so this year, I'm determined to get a jump on it. =)

Hope you've enjoyed my little card.  The challenge is open through Wednesday at 7:59 am....feel free to join in.

Have a great day.....

Tuesday, August 17, 2010

Fabulous @ 50 Birthday Card

Today is a co-workers 50th Birthday  -- tTo celebrate, I will be taking her to lunch.  I also wanted to make her a card.....so after work, I headed into my craft room to start creating.  It took me a couple hours as I was playing with different papers and designs....this is what I ended up with.

I used the Forever Young cartridge for this one.  I used Forever Young to cut the girl and her outfit at 3 1/2".  The word fabulous was cut at 3/4".  The tag was cut using a Creative Memories punch - I altered the tag by cutting it down a bit to fit the card better.  The ribbon I used is a velvet ribbon - I love the texture of it.  I also used one of the new Martha Stewart border punches for my border.

Have a great day.....
 

Monday, August 16, 2010

Post It Note Holders

This is an idea I've seen across several blogs and on the message boards that I've wanted to try but hadn't found the time to do.  The tutorial can be found on the Splitcoast Stampers site (here).  I thought these would make cute Christmas gifts for some co-workers.  These are so simple and quick to make that I'm sure I'll be making several more over the next couple months.

These were made using 4 x 6 acrylic photo frames.  The post-it notes were ones I found in the $1 bin at Target.  The sentiments are both from My Pink Stamper's stamp sets. 

I think these would turn out nicely using a 5 x 7 acrylic frame also - just use the longer post-it note pads on it.  Will have to give that a try. :)  In the meantime, the next time I go to WalMart, I'll be buying up a few more of these frames.

Have a great day.....
 

Sunday, August 15, 2010

Card Set #1

This is the 1st of several card sets that I'm planning to make as Christmas gifts for some friends this year.  I was able to get this set of 6 done on Friday evening while I was at the monthly Creative Memories crop I go to.  It felt like forever since I'd been to crop as I had to skip the July one due to my BILs wedding.

I didn't use the Cricut on any of these cards.  My MIL had forgotten her mat and as I didn't bring my Cricut to crop as I had planned on sharing hers....both of us were sadly left without use of the cricut. :)  However, I did have several border punches with me and some embellishments and ribbon.....I really like how they turned out.  Sometimes simpler is better. :)

Each of the 6 cards, has a different sentiment - they include:  'Make a Wish', 'Celebrate Today', 'Birthday Fun', '{Hugs}', 'Get Well', 'Just Because'.  I tried to use sentiments that were somewhat generic so the cards could be used for several occasions.  The sentiments were stamped using My Pink Stamper stamps and PaperTrey Ink's Mixed Messages stamp set.
 
To package them, I decided to place all 6 cards (with envies) in a plastic bag and attach a bag topper.  This was my first time doing this, but I'm pretty happy with the end result.

Thanks for stopping by and taking a peek.  I hope you've enjoyed these as much as I enjoyed making them.

Have a great day.....

Birthday Cards

Well, it sure has been a while since I've been able to spend some time in my craft room....what a wonderful feeling it is to get back to it.  I've returned with a vengeance. :-)  Last night I was able to get a set of 6 cards done (will post via separate entry) as well as a belated Birthday card for my brother.

I really like how the card turned out.  I sooooo love my Create a Critter cartridge.

The card is a standard A2.  I can't remember what size the bee and hive are cut at.  I used some chalk ink to soften the edges of the hive and blended it across the front of the hive as well to add a bit of dimension.  I also used Stickles on the bee wings and the heart at the top of the hive.

The sentiment is from My Pink Stamper's Family and Friends stamp set.

Last weekend was my Mother-in-Law's birthday.  I made a real quick card just in time for dinner.  For this card I used A Child's Year.
 
I kept this one pretty simple....but of course, I added a bit of bling with Stickles and the iRock.

Hope you have enjoyed these cards.  I'll be posting the card set tomorrow morning as it's already late here.
Have a great day.....

Sunday, July 25, 2010

MIA - Sorry, it'll be a bit longer....In the meantime, check out KinderStampOs Blog Hop

Hi there everyone! 

I hope you are all having a wonderful summer.  I've been MIA for a bit - I haven't had any time for crafting.  I went home to MO to visit my parents and brother for a week over the 4th of July weekend.  The weeks leading up to my vacation and the weeks since I've been back have been filled with work.  I am part of a team working on a project at work that goes "live" on 08/01/10, so we've been putting in a lot of extra hours, including weekends, to ensure we have everything ready for the "live" date.  I'm hoping I'll be able to find some time to craft again the weekend after next. {crossing fingers}  I so miss my craft room.

In the meantime, I hope you'll take a chance to check out the KinderStampO's Christmas in July Blog Hop (http://www.kinderstampo.com/).  There are 15 talented bloggers who are participating in the hop.  I've definitely gotten some great ideas for some Christmas projects when I checked out the hop.  Even though it is nearly 100 degrees here....the hop put me in the mood for Christmas. :)

Well, I'm about to head in to work for a bit.....hoping to be home before my hubby gets home so we can have dinner together.  I hope you all have a great day.....

Monday, June 14, 2010

Shower Favors

I got the Bridal Shower favors for this coming Saturday done.  Now I just need to make one of the purses from the Forever Young cartridge to hold the favors...and do that times 15. :)

"Candle Pops"
First, I made some "Candle Pops" that I found on Audrey's blog (Cute and Some).  To make these, I bought some tealight candles at Target in purple and white (wedding colors).  Then I attached a lollipop stick to the bottom of the tealight with my hot glue gun.  I then cut 1" circles out of adhesive labels to cover the back - to hide the stick and hot glue.  Lastly, I wrapped a piece of tulle around the 'pop' and tied it with a ribbon.  For the purple tealights, I used white tulle and a light purple ribbon.  For the white candles, I used purple tulle and white ribbon.

Altered RSVP Pen
I also made some Altered RSVP pens.  I got the idea from the SplitcoastStampers site....you can view the tutorial here.  However, instead of using designer paper, I used some Avery labels and stamped them.  I then adhered the stamped label to the ink barrel.

Post-It Note Holder - Matchbook Style
I then made some Post-It Note holders.  Again, I got this idea from the SplitcoastStampers site....tutorial can be viewed here.  To fit a 3 x 3" post-it note, I cut the white cardstock at 3 1/8" x 9 1/4" and then scored it at 3 3/8", 3 3/4", and 7 3/4".  I used 2 different EK Success border punches on the bottom flap and added some purple ribbon.  For the cover, I cut some dark purple cardstock at 3 x 3", then layered some lighter purple cardstock, cut at 2 3/4 x 2 3/4".  I inked the edges of both pieces, and the tag, with VersaMagic Chalk Ink in Purple Hydrangea.

Next, I cut the "Thank You" from light purple cardstock at 1 1/2" using my gypsy and the Tie the Knot cartridge.  I used the gypsy so I could use the hide contour feature to hide the little hole/opening that is supposed to be at the top of the tag.  I then used hide contour to hide the wording so I could get a solid tag and cut it in white so I could layer it behind the purple tag.  I used "Fabric Fancies" Flowers in Opal, from Prima, to add a 'final' touch.  For the center of the flowers, I added a metallic purple brad to some and a purple skittle to others.  I used different combination's for the flowers.  I used a Zot dot to adhere the flowers and pop dots to adhere the tag.

All in all, I got quite a bit accomplished yesterday.  Now, I just have to finish the 'holders' for the favors and order the cupcakes.  Work is going to be crazy busy this week and I'm sure I'll be working late most nights, so not sure when I'll be able to fit it all in yet.  Luckily, I have a crop to go to Friday night, so I may have to work on all 15 purses during crop so I can get them done in time for the Shower Saturday.

Have a great day!

Saturday, June 12, 2010

And the Winner is...............

Hi Everyone -

Hope you are having a great Saturday!  It's been a long week and I'm hoping I can finally get some time in my craft room this weekend.  As I mentioned in my post yesterday, I have a ton of stuff to do for the upcoming Bridal Shower.  If anyone has any ideas for favors, please let me know.  I saw some cute "Candle Pops" on Audrey's blog (Cute and Some) that I thought would be cute...so I'm planning to scraplift those. 

First, I have to clean-up the house and do some laundry.  I've been working a lot of late nights this week so am a bit behind.   Also, my husband's aunt and 5 yr old daughter have been staying with us most of the week while her hubby was in the hospital.  My hubby and I also celebrated our 3 yr Anniversary on Tuesday.  So, it's been a bit crazy.

Well, I guess I've kept you in suspense long enough.  So I'll get on with it and announce the winner of the Independence Day cartridge.  There were a total of 18 comments left.  I assigned each name a number 1 - 18, in the order comments were left and used Random.org to select the winner.

The winner of the Independence Cart is........................................
(are you ready?)

*BJ*


*BJ* said...
I don't have the cart but it is one I would like to have.. I am a follower. Would love to win this cartridge.

Congratulations BJ!! 

Please send me your mailing address and I will get the cartridge in the mail to you.  You have until Tuesday (06/15/10) to send me an e-mail at ncscrapper77@gmail.com.  Otherwise, I'll have to draw a new winner.   Thank you to all that participated and to all of my followers.  I hope everyone has a wonderful weeekend.  It's supposed to be in the 90's here all weekend - Woo Hoo!!

 Have a great day!

Friday, June 11, 2010

Last Day to Enter for Blog Candy

Don't forget....today is the last day to enter for a chance to win Blog Candy.  Check out the post here.

Unfortunately due to work and various things going on, I haven't had a chance to get in my craft room.  But, I have got to get in there this weekend.  I need to make 15 Bridal Shower favors.  My BIL is getting married 7/10 and my MIL and I are throwing my future-SIL a Bridal Shower next weekend (6/19).  Once I get the favors done, I will definitely post some pics.

Have a fabulous Friday!

Friday, June 04, 2010

Paying it Forward - Blog Candy Time

Recently I was the recipient of a RAK by a fellow cricut message board member, DazyCutr.  She sent me a gorgeous chain for my Gypsy stylus.  In an attempt to pay it forward, I am offering up the Independence Day seasonal solutions cartridge as Blog Candy.  If you don't have this cartridge yet, you really should check it out.  It has some really great images on it and will come in handy for Independence Day - which is exactly 1 month from today.  Perfect timing, right? 

In order to ensure you have the cartridge in time for the holiday, the deadline to enter to win for this "candy" is one week from today - June 11, 2010 - at 10 p.m. EST.  This way I can get it in the mail the following week to ensure you have it in hand before I go on vacation and before the 4th of July.

Image courtesy of the Cricut website (http://www.cricut.com/shopping/images/products/966/original/A4-2000319-IndependanceDay_samplesheet.jpg)
So......I'm sure you are wondering what you have to do to enter.  It's pretty simple:
  1. Become a follower of my blog
  2. Post a comment on this post 
  3. Lastly, you must reside within the US as I am unable to ship internationally. 
Then, check back on Saturday, June 12, 2010, to see if you are the lucky winner.  The winner will be chosen using random.org.  The winner must e-mail me their mailing info no later than the following Tuesday, June 15, 2010.  If the winner doesn't contact me within that time period, I will be forced to pick another winner -- and we don't want that, do we? :)

Pretty simple, right?  I can't wait to see who will win.  Don't forget the deadline to enter is June 11, 2010 at 10 pm EST.  Have a great weekend.....

Wednesday, June 02, 2010

Baby Shower Card

Hi there -

This is one of the cards I made over the weekend.  My MIL is throwing a baby shower for a friend of ours this coming Saturday.  Unfortunately, I already had plans to go see the musical Wicked this Saturday....so I won't be able to attend the shower.

However, I did want to help celebrate this joyous occasion so I dropped off my gift at my MIL's house on Sunday along with the card.  I was so thrilled with how this card turned out -- I think it is toad-ally cute. :-)  I wanted to use a frog on the card as she is doing the baby's room in a tropical theme and is using frogs.

I used my Gypsy to design the card using the Celebrations and Create a Critter cartridges.  First, I selected the base card from the Celebrations cartridge.  I used the card feature and selected the cupcake key.  Using the Hide Contour feature, I hid the cupcake so I would end up with a solid card.  The card is cut at 9.47" high...this created a card that is just shy of 5 x 5".  Next I cut the frog from the Create a Critter cartridge at 2.5".  I cut out all layers for the frog, including the shadow at 2.5".  The only feature key I did not use for the frog was the phrase feature.  I cut the word cloud using the phrase feature key and the pig key.  I cut the cloud at 1.79" and at 2.03" for the shadow.  I used various cardstock for the card.  The lily pad was cut from a Die Cuts with a View pad.  The top half of the base layer was cut from a Baby Boy pack I got at Big Lots.  The bottom base of the card, frog layers, and word cloud were all cut from plain cardstock.  I added a bit of ribbon so you wouldn't see the seam where the background layers were joined.  And I added some doodling to the frog's belly and the word cloud for a bit more detail.  I also put white cardstock behind the frog's eyes as I didn't want them red and then added the black pupil part with a marker.  The sentiment was from the 'All Occasions' stamp set by Inkadinkadoo and was stamped using Inkadinkadoo chalk ink from the Earth Tones set.  On the inside I stamped another sentiment that reads "Babies are such Sweet Beginnings " from the Simple Thoughts - Baby stamp set by Cloud 9 Designs.  (I forgot to take a picture of the inside.)

Hope you are having a great week.....

Tuesday, June 01, 2010

Fabulous!

This is a card that I've been wanting to make for a couple weeks but didn't get around to finishing until this weekend.  I've been dying to use my Forever Young cartridge and make one of the "fabulous" and "hip" woman cuts.

This is a 5 x 7" card.  Unfortunately, I don't remember what size the woman or the sentiment is cut at as I cut these out a couple weeks ago while I was at a crop.  I'm thinking they were cut around 6"....but I could be wrong.  The base of the card is a sheet of purple cardstock cut to 10 x 7" and folded in half to create a 5 x 7" card.  The mat is from the DCWV Latte Matstack.  The paper used for the sentiment and the mat under the sentiment is also from this matstack.  I love the papers in this stack - they are really soft looking.

The dress is cut from a light purple cardstock and the flowers on her dress and pocketbook are cut from a yellow cardstock.  The band at the bottom of her skirt and part of the flower at her waist are cut from a scrap sheet of paper left over after cutting the sentiment.

To add some detail, I used a Souffle pen in purple to add the hair band and her shoes.  I also used an orange pen to add the center of the flower on her pocketbook.  I also added some bling to the yellow flower at her waist with Diamond stickles and to the handle of her pocketbook with Starry Night stickles.  I used an EK Success border punch to add a bit of detail to the mat for the sentiment.

I really like how this turned out and have a dear friend in mind to give this.  Have a great day..

Monday, May 31, 2010

Happy Memorial Day

I hope everyone is having a wonderful Memorial Day.  Please take a moment to remember our service men and women who are currently serving or whom have served in the military.  I personally am grateful and thankful for all of our veterans and those currently serving in our military, including my friends and family members, among them my dad and husband, who have served (or are serving) in our military and am thinking of them today.  I am also grateful to the families of our veterans as they sacrifice time with their loved ones while they are overseas and fighting for our country.
THANK YOU!
Have a blessed day.

Sunday, May 30, 2010

My Pink Stamper Challenge - Father's Day

Robyn over at My Pink Stamper posted a challenge to make a Father's Day project.  Those who participate in the challenge and link their project to her post will be entered in a drawing for a Cricut Expression donated by ProvoCraft.

Since I still hadn't made my dad a Father's Day card yet, I thought this would be the perfect opportunity, and motivation, to get it done.  I left the card pretty simple...but I really like how it turned out.

For this card, I used the Wild Card cartridge.  I cut the "Happy Father's Day" phrase from a dark red Coordination's cardstock using the phrase feature key at 5.32".  The card base is cut using the same key that has the "Happy Father's Day" phrase on it at 5.63" - no feature key selected.  I cut the base layer twice.  Once out of the Best Occasions cardstock (sorry - don't remember the stack name) with the window opening and once out of brown cardstock with the window hidden using the Hide Contour feature.  The frame around the window was cut from Best Occasions cardstock using the frame feature key and the same key as the previous two cuts.  It was cut at 5.91".  In order to make the wording "pop" a bit - I used the inside cut from the frame piece and cut it down so the phrase fit but still let a bit of the brown cardstock show around the edges.

Hope everyone is having a wonderful Memorial Day weekend!  I've been relaxing and spending some time in my craft room and on my Gypsy.  I got a couple things done this weekend so will try to get those items posted during the week.  Have a wonderful day....

Sunday, May 23, 2010

Blog Candy

Hope everyone has had a wonderful weekend....no crafting for me this weekend, unfortunately.  However, I've been catching up on the Cricut MB and on the blogs I follow.  I came across a post that led me to Debbie's blog (Passion for Crafts) and her very generous blog candy post.

Stop by her blog and check out her blog candy post.  While you are there, check out her awesome projects and sign-up to be a follower.

Have a great week.....

Friday, May 21, 2010

Mother's Day Card

Good Morning all -

First, I want to show you the Mother's Day card I made for my MIL.  I'm a bit late posting this as I was waiting on my hubby to send me the picture of the card he took with his cell phone before giving her the card.
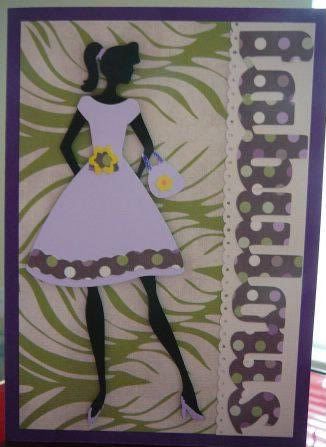
This is an A2 size card.  I used the Mother's Day cartridge and cut the "lace" at 4" and layered it on the shadow.  I also cut the "Mom" using the regular and shadow cuts.  I don't remember what size this was cut at.  For the inside, I printed "Happy Mother's Day" on a piece of paper and adhered it.

It's a very basic card that still came out somewhat elegant.  I really love how the colors pink and brown look together.

(Sorry for the pic quality - hubby had to take with his cell phone as I forgot to take a pic before giving it to him to give to my MIL along with her present...and then he forgot to take a pic with the camera before leaving the house.)


Have a great day.....

Saturday, May 15, 2010

Simple Wedding Card

I'm going to a friends (and co-worker) wedding this evening.  I just got home from running some errands...now I've got to rush to get ready, as I have to pick up another friend so we can ride to the wedding together.

Last weekend, I made this wedding card -- I scrap lifted the design from Robyn over at My Pink Stamper. The card is 4 1/2" x 4 1/2" and the couple is cut at 4" using the Wedding solutions cartridge  The red paper is embossed with the embossing folder from the Love Language Combo Set using my Cuttlebug.  I added Frosted Lace stickles to the veil.  For the inside, I used a Stampendous stamp that says:  "The joining of two hands makes One Heart!"

Have a wonderful afternoon.....
Powered by Blogger.
 
Free blog design by Adori Graphics using the Carefree Summer digiscrapping kit by Adorible Digital Designs